March 18, 2012

An Apron Story

I have become a little obsessed with aprons over the past few years. I've always loved them, especially retro or vintage ones, and it's so much fun that they are back in style now. I have been meaning to tell these apron stories for awhile now. 

Remember my best present ever....tons of vintage fabric from my grandma? 
Well in that stash was this start of a petal skirt, I imagine it was to go at the bottom of a long Gunne Sax type dress. I love the little teapot and teacup pattern. But what to do with it?

Turn it into an apron of course!

There was some bits and pieces and some yardage too of the same prints so I removed the two end "petals", devised a waistband and ties, and sewed it all together! The hard part of sewing those curved pieces was already done for me! Some of it was handsewn so I went over it with my machine to reinforce it.

While I was at it, I used the extra "petals" that I had removed and some of the yardage to create some decorated kitchen towels and a hot pad! I used the same pattern and techniques as the hotpad I'd made in the past. 

I think there's gotta be a law somewhere that when you photograph aprons, it has to be done on a clothesline. Has to.  


I love how it all turned out. 
I obeyed the law. ;)

Not long after, I used this half made shift dress from the vintage stash. It has the same print on both sides and was basically the same front and back except the front had bust darts. It was unfinished and no one I know is that small or needs a short giraffe dress so I unpicked it all and decided to use one side to make an apron!


I used McCalls M5720 apron pattern and some bright green gingham from the vintage stash and I loved how it turned out- so fun! I knew when I saw the giraffe print that it had to be for my dear friend Heather- she loves giraffes and I love butterflies, so to find them together in a funky print was great to represent "us". Best part is, I still have the other giraffe panel to make me a twin apron!


Here's another pic so you can see the gingham:

The bottom of the giraffe panel was not wide enough at the bottom so I had to do a little pattern drafting of my own and figure out some wedges to fill it out. Thankfully they're not very noticeable, shhh! 

Recently my other dear friend Stef got married and I knew she wanted red in her kitchen and she loves polka dots so I used this in my stash to try out Butterick's See & Sew B5125 to create this sweet apron for her. 


I was in a hurry and didn't get the greatest photos of it but I loved how it turned out. I love polka dots! It's a little more complicated of a pattern what with the facing at the neck and arms but I was glad to figure out the pattern so I can make one this style for me!  I was pretty proud of my tiny rolled hem at the bottom of the flounce. This pattern takes a lot of fabric, but it's so sweet. This pattern also offers a half apron option, that will be fun to do as well!

Last Christmas, my friends at church and I got together and made Christmas cookies...I love looking the part so I dug out my vintage Christmas apron (only a couple dollars at a garage sale, score!) and had some fun looking quite festive and domestic. 


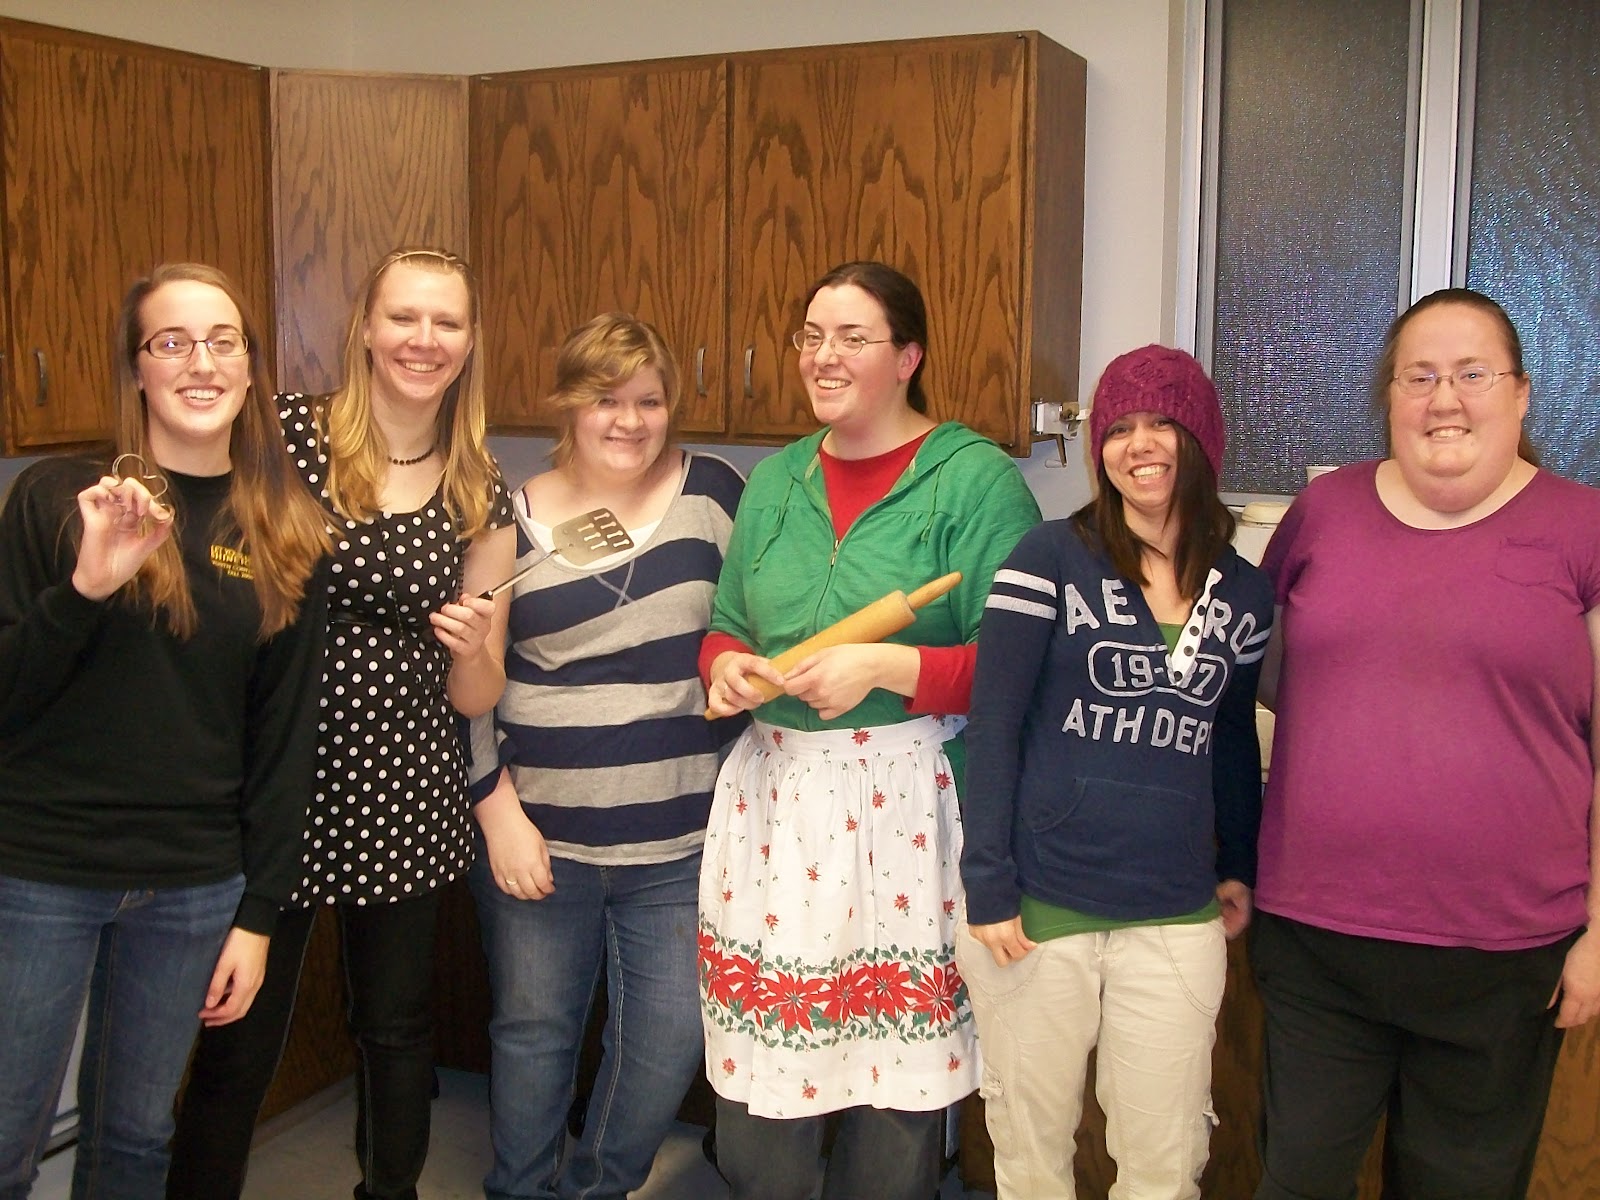
Gee, which one am I? ;)

That's all my apron stories for now- but I'm sure there will be more soon! 


December 31, 2011

I'm Dreaming of a Pink Christmas

I helped my friend makeover her place for her first Christmas in her new apartment. Since she already had pink going on, we decided to create a pink Christmas- red and green would have clashed!

Who says Christmas has to be red and green? It's fun to be creative!
I pulled out all my pink and silver things and also had fun creating a couple things.

We set out to have the girliest Christmas ever and I think we accomplished it!

Here's the tree:


 Had some silver trees too:
Note the pink shoe ornaments on the tree!

 Closeup of tree:


Wall of love:


The mantle:


Made the pink crepe tree on the right, showed you how in my last post:


I made the wreath over the mantle- it takes some ribbon but it's easy!
All you do is tie bows over a styrofoam wreath form (I painted it pink first).

Hung this ornament from a doorway:


Loved the pink wreath and big bows in the couch area:


And here's the whole room, tah duh!


It was a girly Christmas, I loved how it turned out! 

You can't help but be happy in this room.

Hope you had a Merry Crafty Christmas too!

December 21, 2011

O Crepe Paper Tree

I am helping my friend make a pink and silver Christmas this year, it's been so much fun to find things for her living room..or make them! I love a vintage look and decided to make this little tree using 1) a foam cone, 2)  pink paint, 3) crepe paper streamers and 4) tin foil/hot glue. Really the only expensive thing is the cone, the roll of streamers was a buck!

I painted the cone pink in case any of it showed, it helps to water down the paint a little so that it gets in all the crevices of the styrofoam.

Take a length of streamer a bit longer than the circumference of the base of your cone, if it's too long you can snip it later on. I folded over the rough torn edge so that it wouldn't show, and then stretched the crepe paper along one edge, creating a ruffledy effect.

When using hot glue, PLEASE be careful- it's easy to burn yourself pushing the crepe paper down to the cone- paper doesn't offer much protection from hot glue.


See how it ruffles?

Using hot glue, tack down a folded over end for the bottom row. As you glue around, gather up the crepe paper so that it ruffles even more. When you get back around to your starting point, trim the edge and fold it under, gluing it so that it overlaps the starting point. 

Keep adding layers (getting even vertical spacing from the previous row is the hard part).

I hate making trees out of cones that bluntly end and do not make a nice point, so I made my own out of tin foil and hot glued it to the top of my cone. If it's not perfect, it's ok since the ruffles will hide imperfections. 


I then hot glued crepe paper around the tin foil so that there wouldn't be an obvious color difference between the ruffles that were over/under the tin foil. It also provided something more stable to glue to.


Added my final row, pinching it at the top. Try to not use much hot glue, you don't want it to show here.


And voila! A vintage looking crepe paper tree fit for a princess.

Crepe paper comes in so many wonderful colors- just think of the trees you could make!

April 6, 2011

Embroidered Postcard Tutorial

I participated in the Iron Craft Challenge this week, which was to create a postcard. Since I love love love postcards, I couldn't pass it up! I have quite a collection going of vintage postcards.

I had wanted to paint a postcard, but that wasn't going to happen. I decided to embroider a postcard. I've embroidered on scrapbook pages before, it's pretty fun.

Here's some pages I did in the past with embroidery:

 Even the wording was embroidered!

Butterfly gardens:

 Used this butterfly design on my postcard. It's a fave.

Stitched the butterflies to the page and stitched their "trails":

I like butterflies. Who woulda thunk it?


I found some kraft cardstock and found some templates for butterflies. I used tracing paper and traced three from an Aunt Martha's transfer sheet, and the upper right one from a purse of mine.

You'll need two 4x6 inch pieces of kraft cardstock. I used a decorative edge scissor and some chalk ink to make the front stand out. Your front piece is now about a quarter of an inch smaller all the way around than the back piece.

I placed my butterflies and taped them down with very small amounts of masking tape. I then went over the tracings with a pushpin (I have a paper piercer somewhere!) to make holes to sew through. I had a piece of corrugated cardboard underneath to protect my table from the pushpin.

It's important to pay attention when piercing the holes- you have to place a hole where there is a corner and you have to round out a curve. It's also important to not put the holes too close together or you might rip through them when sewing.


 I stamped on the front and began sewing. Keep your tracings handy as a reference when you're sewing- sometimes it's hard to remember how all those dots are arranged.

 
After piercing your postcard, you are left with pretty cardboard!


I designed the back of my postcard backwards so that it would be the correct way when flipped over. Punch the holes for it, too. Be sure your elements are in far enough so that the stitching won't show- your front is about a quarter of an inch smaller all the way around then the backside and there's the potential for the stitching on your backside to show.


Embroider away!

I knotted my embroidery floss when I began (I used two strand of floss for ease) but not when I ended a strand. I just wound it through my stitching and left about 3/4 of an inch for a tail- it's not going anywhere.

I used a smaller needle so that I could pull it through the pre-punched holes easily without the eye of the needle getting stuck.

If your stitching doesn't look the prettiest on the back, who's gonna know?


I used some large flat glue dots (not the "3-D" kind) to attach the front to the back, centering it and being sure to cover the stitching on the backpiece.

Voila!


And the back is cute too!


It might survive the mail, but a better way would probably be to mail it in a greeting card envelope. Or make your own envelope!


My mind is boggling with the postcard possibilities- so many cute motifs to do!


December 23, 2010

O Christmas Table

Well, after our carved alien fruit, we spent the rest of the semester designing and creating a table. We were limited in size (our teacher didn't want us going much beyond 3 feet in any direction) so I wound up making an end table. I would have loved to have made a retro kitchen table, a coffee table that could display things, or carve a carousel table, but I wound up making this one. Having wood and metals in the same semester was a challenge- both are time consuming and so I opted to do a table I could finish more easily without living in the wood classroom.

Even so, I got rushed at the end. I would always see wood students racing to finish their projects at the end of the semester and would say "that won't be me". Ha! It was me! I missed a couple days of school due to snow and that threw me off. It was also a major pain to fight to use the equipment, everyone seemed to need the table saw. Everything takes twice as long as you think it will.

In all, I liked the process, just wish I could have enjoyed it a bit better without being so rushed. I also didn't like the nasty rash I got from dealing with wood- I was so itchy I wanted to claw my arms off! I don't know if I was allergic to poplar or to sawdust or possibly walnut- I read recently that people can have allergic reactions to it. I didn't use walnut, but other people did and I was exposed to everyone's dust.

You had to have at least one mortise and tenon joint (which are a pain to cut) and mine had eight to attach the rails to the legs, so it fit the bill. I cut the rail shapes on a bandsaw and then had to file and sand those curves- also a pain! Sanding thru like 4 grits of sandpaper was a pain too- my hands went numb from the electric sander!

I had decided from the beginning to paint my table, so I opted to make it out of inexpensive poplar rather then maple or cherry or something. It doesn't look too bad here after I sanded the heck out of it, but it has a yellow or green cast to it and there's streaks of reddish purple in it too. Other woods are prettier!


Here you can see a purple streak:

I routed the table top and shaped the legs, too:

Thought I'd show what other people did in my class, you had a good deal of freedom:

My friend Angie did this, a lot of joinery on each end. There's at least 32 mortise and tenon joints in this!

This was a well made table but it's not for clutsy people like me- I'd smack into the pointy tabletop!

There was also the option of making a bench- it's pretty much like making a table but your table legs stick up to form the armrests.

One girl painted this top:

One guy did these three table that share a leg- you draw at the tallest one (the top lifts up) and can set your supplies next to you on the smaller table. It takes up a good chunk of space, though.

Someone from the other class did an armadillo table:
 One girl did this cat desk (cat heads on the bottom, fat tail at the top):

One girl did this table complete with "legs"...does it need to go to the bathroom?

 A girl from the other class did this mustache table. I liked it but wasn't crazy about the irregular tabletop.

My table isn't complete, you just had to have one coat of something on it for crit so all it has on it now is black milk paint. It needs another coat or two and then a coat of satin finish sealer. But that's not happening til after Christmas!


You know what I really want to make? Shaped cutting boards! I know how to glue up boards and clamp them and shape them with a bandsaw and a router...now I need all that equipment in my dream art studio!

November 19, 2010

Art Auction

Recently I participated in the annual student art auction on campus. The problem with studio classes is that you are usually making things that either you want to keep or no one will want to buy (like the odd practice still lifes that we did for most of the semester in painting class or the 20 body parts for sculpture) and that I don't have much extra time to make things to sell. When this year's auction rolled around, I actually had stuff to submit- extra prints from print class last semester. I picked a few out to auction and sold four of them. The Student Art League takes a 25% cut of the bids, but even after their cut, I had made $18.75! Not bad, I was pleased. I found out later that my woodshop teacher had bought one of them!

I don't think I ever got around to posting the rest of what I did in print class, I'll have to show that sometime. I would love to do more in that area, but the classes fill up crazy fast- way faster then the other studios.

I was pleased with a lot of the artwork up for bid- in past years there has been a lot of crap because they will let anyone submit anything. Last year I was outbid and didn't win anything, so it was a pleasant surprise to win three of the four things that I wanted.

So here's what I won:


This is a little (about 8x10") photo/painting collage on board by Mel Keiser. She has done some really great paintings in shows on campus so I was excited to own one of hers. I fell for the hair/flowers area. I don't like a lot of collages because it's often hard to mix materials and make it work but I think it works here. I paid $14 for it.


This intaglio print is called "A Lot of Frames to Fill" and it's by Makenzie Cherban. This is done with a metal plate and she scratched all those lines into a coating on a metal plate that was then put in acid to eat away the lines. Printing is time consuming as well- you fill the lines in with ink and then wipe wipe wipe the surface of the plate- when it goes through a press, the enormous pressure pushes the paper into the lines and you get a print. 

It's pretty large and I liked all the ornate frames- it made me think of the one I spraypainted black. Worth $9 to me.


I had seen this unframed in a different show and liked it- so I was glad to see it in the auction. Entitled "Barflies", it's by Courtney Bryan and I thought she made a fun screenprint. I liked the positive/negative space and bright colors. I liked the fly silhouettes. Registration (things lining up) is always an issue for printmakers. Sometimes mis-registration works and sometimes it doesn't but I like the way the black outline is off. I paid $31 for this, which was a bit expensive but if I were to frame it myself I'd be spending a chunk on that so it actually is a good deal.


This is the one I wished I'd won:

I really enjoyed this painting- I really liked the tones/colors used in it and the technique is good. It's larger- about 2.5' square. A big reason why I liked it so much was that I did a series of similar b&w handprinted photographs way back in 2001 that were very well received (and won me prizes and money and clients). I would have loved to have had this up with them on my wall. Sometime I will have to scan and show those. I would love to have that series become a book.

A lot of people want to collect art but don't know how to go about it. Clearly I'm not collecting art as an investment, but for enjoyment. I think that often people worry too much about collecting names or spending lots of money. I don't believe that collecting art has to be expensive, quite the opposite. I've found great stuff for pennies. I feel that a lot of the expensive art out there isn't worth it. A lot of art is expensive because of time and materials but just because it is a Warhol doesn't mean that it is the best thing ever- artists generally have periods of artmaking that are better than others and this could be part of the lesser stuff. And there might be some no-name thing that is the best thing ever.

A lot of people say "I don't know art but I know what I like". Exactly. Collect what you like. It's ok to do so! Then it will be worth something to you.

The art world is a two way street- creator and collectors. I think it's important to support the art world-  I like it when people look at or buy my stuff so I make an effort to see what other people are doing. If I fall in love with something, then I'll make an effort to own it. Art makes our world interesting.

For crying out loud, support your artists- who wants to have a boring cookie cutter living room anyhow? If I can duplicate your living room down to the manufactured BB&B art on your walls, then there's a problem.

Be unique.


And can you tell that I will need a LOT of wallspace in my future abode?